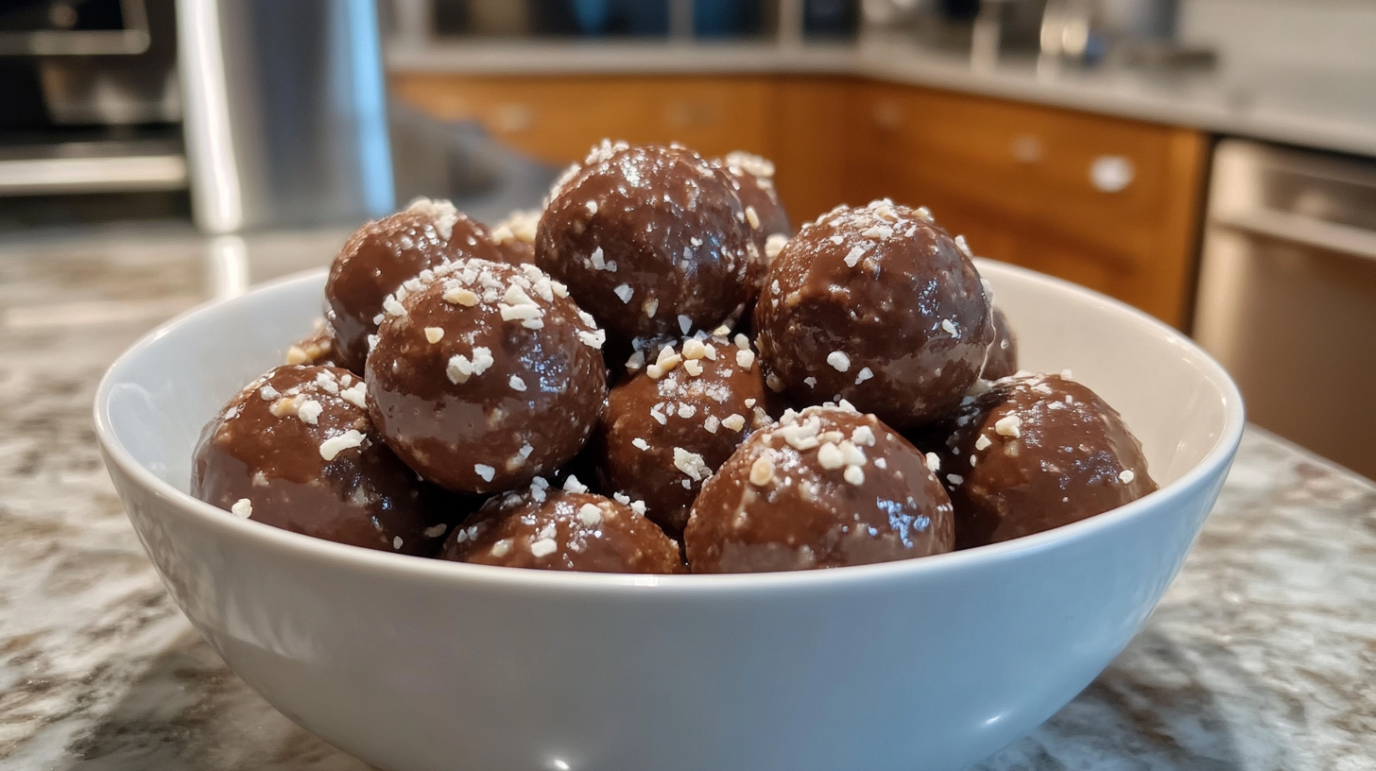
If you’re a fan of delicious, easy-to-make treats, peanut butter balls should be at the top of your list. Whether you’re looking to satisfy your sweet tooth or need a quick, energy-boosting snack, these irresistible treats deliver both flavor and satisfaction. You may find them at parties, as holiday gifts, or even in your own kitchen as a snack for when cravings strike. The best part? You can make these delectable peanut butter truffleswith just a few simple ingredients, and they’re easy to customize based on your preferences.
In this article, we’ll guide you through everything you need to know about making peanut butter balls, from their fascinating history to the best tips and tricks for perfecting your recipe. With each step, you’ll be able to craft a batch of peanut butter balls that everyone will love. Keep reading to learn how to make your peanut butter balls stand out, along with some helpful tips and variations to suit your taste.
Table of Contents
History
The story of peanut butter balls is a fascinating one, rooted in the American love for peanut butter, a beloved food ingredient that has been around for centuries. Peanut butter, first introduced in the late 19th century, quickly became a pantry staple in households across the United States. As peanut butter gained popularity, people began experimenting with different ways to incorporate it into recipes, including candies and treats.
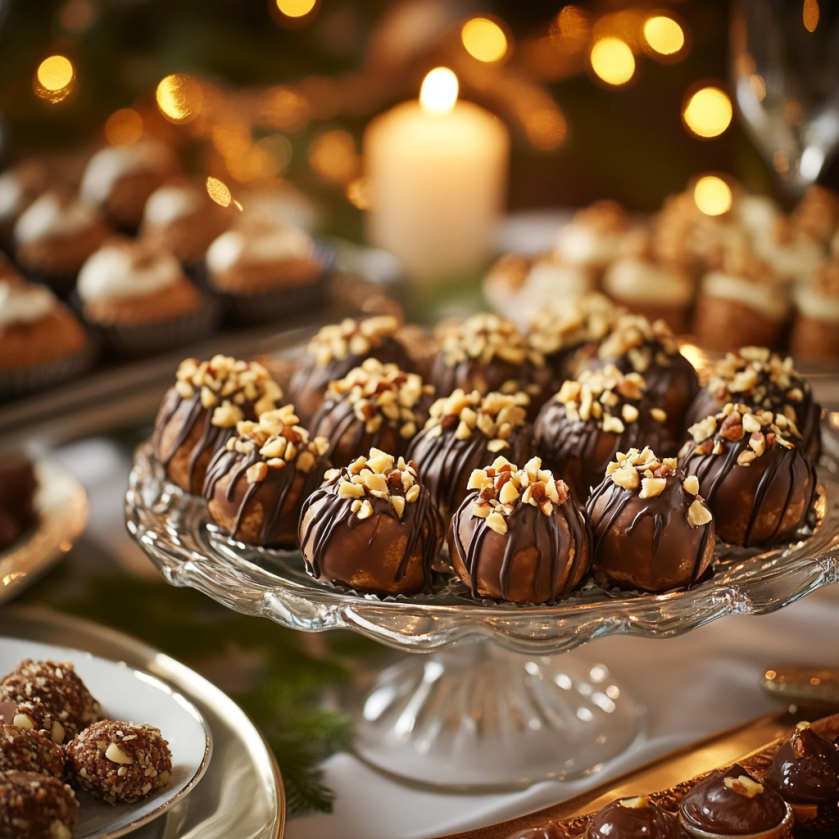
Peanut butter truffles likely emerged in the early to mid-20th century as a simple yet satisfying dessert. With their easy preparation and delicious flavor, they became a go-to treat for many families. These sweet balls, often coated in chocolate or rolled in crushed nuts, quickly gained popularity at gatherings, and over time, the recipe evolved into numerous variations, each with its unique twist. Today, peanut butter drops are enjoyed by people of all ages and are especially popular during holidays or as homemade gifts.
Key Ingredients for Perfect Peanut Butter Balls
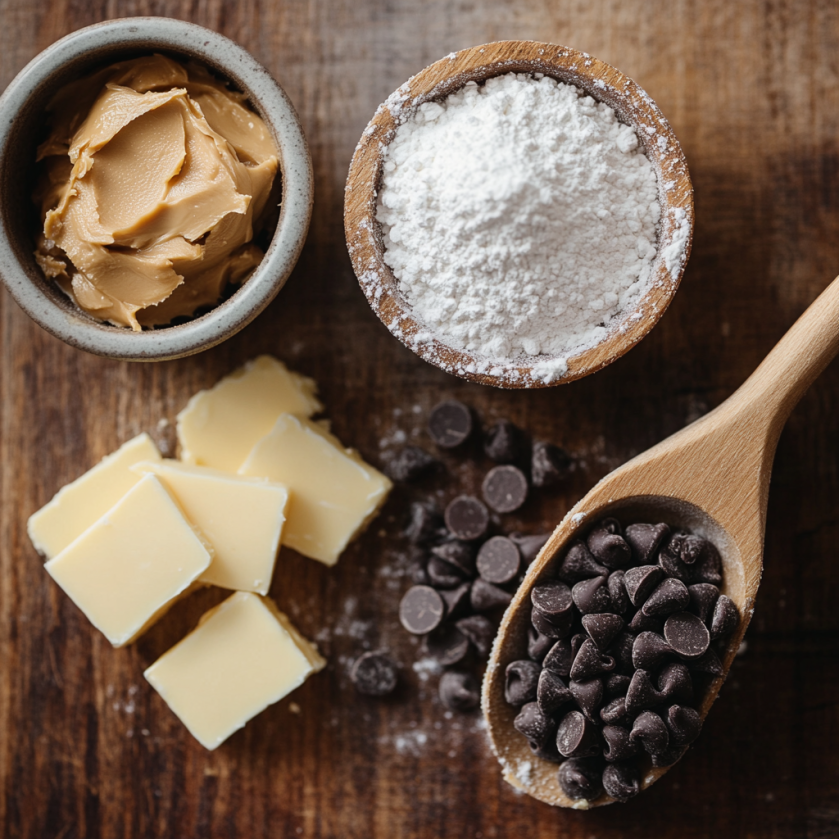
To create the perfect balls, you only need a handful of ingredients. Each ingredient contributes to the rich, creamy texture and the irresistible taste that makes these treats so special. Let’s take a look at the essential ingredients you’ll need to make your peanut butter balls shine:
| Ingredient | Purpose |
|---|---|
| Peanut Butter | The main ingredient, giving the balls their creamy texture and nutty flavor. |
| Powdered Sugar | Provides sweetness and helps bind the ingredients together. |
| Butter | Adds richness and smoothness to the texture. |
| Vanilla Extract | Enhances flavor with a subtle, aromatic note. |
| Chocolate (optional) | Used for coating or drizzling to add flavor and texture. |
These ingredients come together to form the base of the peanut butter balls. You can adjust the amounts depending on your personal preferences and taste. For example, adding more powdered sugar will give you a sweeter treat, while more peanut butter will create a richer, nutty flavor.
Step-by-Step Recipe
Now that you know the key ingredients, it’s time to dive into the recipe for making your own peanut butter balls. Follow these simple steps, and you’ll be enjoying your homemade treat in no time.
Ingredients:
- 1 cup of peanut butter (smooth or crunchy)
- 1/2 cup of butter, softened
- 2 cups of powdered sugar
- 1 teaspoon of vanilla extract
- 1 cup of chocolate chips (optional)
Instructions:
- Mix Peanut Butter and Butter
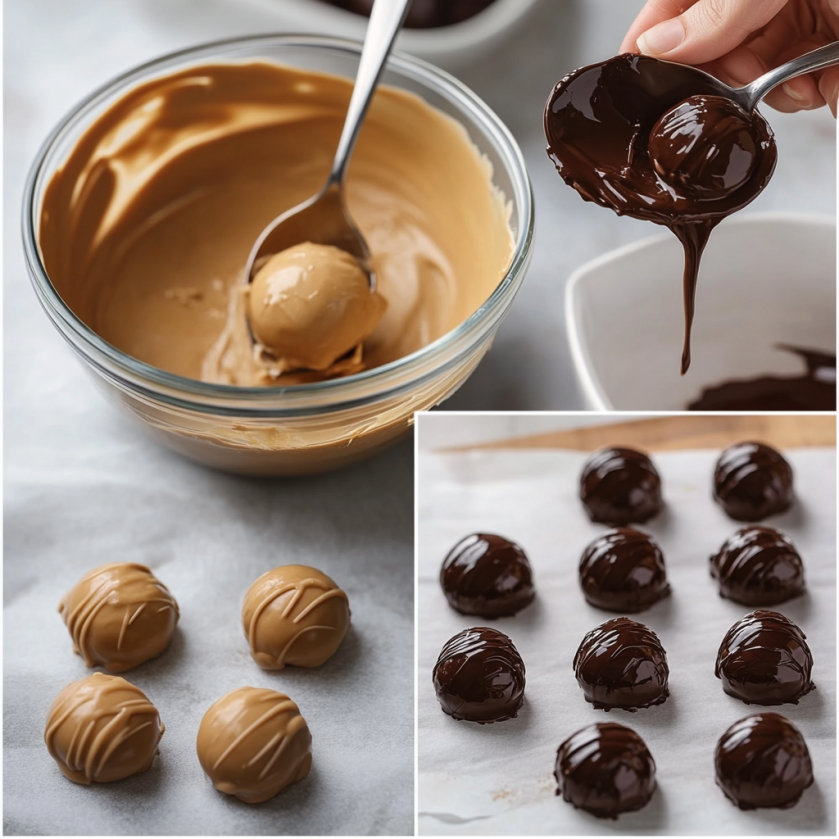
In a large bowl, combine your peanut butter and softened butter. Stir until they are fully blended together and form a creamy consistency. The butter will help smooth out the texture of the peanut butter and make it easier to shape into balls. - Add Powdered Sugar and Vanilla Extract
Gradually add the powdered sugar to the peanut butter mixture, stirring continuously to avoid clumps. Once the sugar is fully incorporated, add the vanilla extract and mix until smooth. - Shape the Peanut Butter Balls
Use your hands or a spoon to shape the peanut butter mixture into small balls, about 1 inch in diameter. Lay them out on a parchment paper-lined baking sheet to prevent sticking. - Chill the Peanut Butter Balls
Place the baking sheet in the refrigerator for about 30 minutes or until the balls are firm enough to handle. - Optional: Coat with Chocolate
Melt the chocolate chips in the microwave or on a stovetop. Once the peanut butter balls are chilled, dip them into the melted chocolate, covering them completely. Return the chocolate-coated balls to the parchment paper and chill again to set the chocolate. - Enjoy!
Once the chocolate has set, your peanut butter balls are ready to serve. Enjoy them as a snack, dessert, or gift them to friends and family.
Variations of Peanut Butter
One of the best things about peanut butter balls is their versatility. You can easily modify the recipe to create unique flavors and textures that suit your personal taste. Here are a few variations to consider when making your next batch:
- Chocolate Coating Alternatives
If you’re not a fan of traditional chocolate coating, try using white chocolate, dark chocolate, or even milk chocolate for a different twist. - Add-ins for Extra Texture
Add chopped nuts, like almonds or peanuts, to your peanut butter mixture for an extra crunch. You can also mix in rice krispies or oats for a lighter, more textured bite. - Healthy Peanut Butter Balls
For a healthier alternative, use natural peanut butter and substitute the powdered sugar with honey or maple syrup. You can also replace the butter with coconut oil for a dairy-free version. - Peanut Butter and Jelly Balls
To give your peanut butter balls a classic flavor combination, add a spoonful of jelly or jam to the center of each ball before chilling. This brings a fun twist to the traditional recipe.
Tips for the Best Balls
To help you achieve the best results, here are some tips for making your peanut butter balls even more delicious:
- Use the Right Peanut Butter
Choosing the right peanut butter is key to the flavor and texture of your balls. Go for a creamy peanut butter that’s easy to mix, or if you prefer a bit of crunch, use a crunchy peanut butter. - Don’t Skip the Chilling Step
Allow your peanut butter balls to chill in the refrigerator for the best texture. Chilling helps them firm up, making them easier to handle and dip in chocolate. - Roll the Balls Evenly
Use a small cookie scoop or your hands to roll the balls into uniform sizes. This ensures they will all set at the same time and have an even texture. - Experiment with Coatings
While chocolate is the most common coating, you can get creative by rolling the balls in chopped nuts, coconut flakes, or even sprinkles to give them extra flavor and flair. - Keep Them Fresh
Store your peanut butter balls in an airtight container to keep them fresh for up to a week. For longer storage, place them in the freezer, where they can last for up to a month.
How to Stores
Once you’ve made your delicious peanut butter balls, it’s essential to store them properly to keep them fresh and maintain their texture. Proper storage will ensure that your homemade treats last longer, so you can enjoy them whenever you want.
To store your peanut butter balls, follow these simple tips:
- Refrigeration: After making the peanut butter balls, place them in an airtight container and store them in the refrigerator. This helps them stay firm and fresh. They will typically last for up to one week when stored this way.
- Freezing: If you want to keep your peanut butter balls for an extended period, consider freezing them. Simply place them on a baking sheet and freeze until solid. Once frozen, transfer them to a freezer-safe container or bag. Frozen peanut butter balls can last for up to a month.
Proper storage ensures that you can enjoy your peanut butter balls over time without worrying about them going stale.
Freezing Tip: If you’re making a big batch, you might wonder, Do Peanut Butter Cookies Freeze Well? – the same goes for these peanut butter balls!
Pairing Peanut Butter Balls with Other Treats
While peanut butter balls are delicious on their own, you can elevate your snack experience by pairing them with other treats. Whether you’re hosting a gathering, preparing for a holiday, or just enjoying an afternoon snack, the following combinations will complement your peanut butter balls perfectly.
Here are some pairing ideas to consider:
- Chocolate and Nuts: Pair your peanut butter balls with chocolate bars or other nut-based treats for a rich, indulgent snack. The combination of peanut butter and chocolate is classic and always a hit.
- Fruit: Fresh fruit like strawberries, apple slices, or bananas can add a refreshing contrast to the richness of peanut butter balls. The natural sweetness of fruit complements the creamy peanut butter flavor.
- Coffee or Milk: A cup of coffee or a glass of milk is always a great beverage choice when enjoying peanut butter balls. The smooth texture of milk balances the richness of peanut butter, while coffee adds a nice contrast for those who enjoy a bolder flavor.
These pairings will enhance your experience and provide a satisfying variety of tastes.
Health Benefits and Nutritional Information
When it comes to treats, you may be wondering if peanut butter balls can be considered a healthy option. While they are indulgent, they do offer certain nutritional benefits, especially when made with healthier ingredients. Let’s take a closer look at their nutritional value and health benefits.
Nutritional Breakdown:
| Nutrient | Amount per Serving |
|---|---|
| Calories | 120-150 kcal |
| Protein | 4-6 grams |
| Fat | 9-11 grams |
| Carbohydrates | 10-14 grams |
| Fiber | 1-2 grams |
| Sugars | 7-10 grams |
- Protein: Peanut butter balls provide a decent amount of protein, which is essential for muscle repair and growth. Peanut butter itself is a great source of protein.
- Healthy Fats: Peanut butter contains monounsaturated fats, which are heart-healthy fats. These fats are beneficial when consumed in moderation.
- Vitamins and Minerals: Depending on the ingredients used, peanut butter balls can also provide a variety of vitamins and minerals, including vitamin E, magnesium, and potassium.
While they are rich in calories, if consumed in moderation, peanut butter balls can be part of a balanced diet.
Common Mistakes and How to Avoid Them
When making peanut butter balls, there are a few common mistakes that can impact the taste and texture of your treats. By being mindful of these potential errors, you can ensure that your peanut butter balls turn out perfectly every time.
Here are some common mistakes and tips on how to avoid them:
- Not Using Enough Peanut Butter
Ensure that you use enough peanut butter to bind the ingredients together. If the mixture is too dry, your balls will fall apart. Adding more peanut butter will give the balls a creamy texture and help them hold together. - Overmixing the Mixture
While it’s important to mix your ingredients thoroughly, overmixing can make the texture of your peanut butter balls too soft or greasy. Stir just until the ingredients are well incorporated. - Skipping the Chilling Step
Not chilling the peanut butter balls before dipping them in chocolate can lead to a messy, difficult-to-handle texture. Always chill the balls before dipping to ensure a clean and smooth coating.
By following these simple tips, you’ll avoid common mistakes and create the perfect peanut butter balls every time.
For Special Occasions
Peanut butter balls are not just a casual snack – they can be an excellent treat for special occasions. Whether you’re preparing for a holiday party, a birthday celebration, or a family gathering, these treats are versatile enough to fit any event.
Here are some ideas for using peanut butter balls in special occasions:
- Holiday Gifts: make a wonderful homemade gift, especially around the holidays. You can package them in decorative containers or gift boxes, making them a sweet and thoughtful present.
- Party Treats: If you’re hosting a party, peanut butter balls can be a crowd-pleaser. You can offer different variations, such as chocolate-coated or nut-coated, to cater to different tastes.
- Wedding or Baby Showers: Mini peanut butter balls can be an elegant addition to any dessert table at weddings or baby showers. The bite-sized treats are easy to serve and can be customized to match the event’s theme.
Peanut butter balls are a versatile and delightful treat for any special occasion.
Want more peanut butter flavor?
Try pairing these with the Best Peanut Butter Cookies Recipe for the ultimate peanut butter treat combo.
FAQs :
Are peanut butter balls healthy?
Can be part of a healthy diet, especially when made with natural ingredients. They provide protein, healthy fats, and essential vitamins and minerals. However, they are also calorie-dense, so it’s important to enjoy them in moderation.
How long do peanut butter balls last?
When stored properly in an airtight container, peanut butter balls can last up to one week in the refrigerator. If frozen, they can last for up to a month.
What are the different variations of peanut butter balls?
There are countless ways to customize peanut butter balls. You can experiment with different coatings, such as white chocolate or dark chocolate, and add-ins like chopped nuts, oats, or even a touch of honey for sweetness.
Where did peanut butter balls originate?
Likely originated in the United States, where peanut butter has been a staple food for centuries. The treat became popular as a quick and easy dessert or snack that could be made with basic pantry ingredients.
3-Ingredient Cookies – A simple and easy cookie recipe that could appeal to the same audience.
Conclusion
In conclusion, peanut butter balls are not only a delicious treat, but they are also versatile and easy to make. Whether you’re preparing them for a special occasion, pairing them with other treats, or storing them for later enjoyment, these sweet snacks are a perfect choice for any occasion. By following the tips and guidelines in this article, you can make sure your peanut butter balls turn out just the way you want them. Enjoy experimenting with variations, storing them properly, and most importantly, savoring each bite!